
The first time a client called me in a panic about a torn nail, she was holding a wad of paper towels in one hand and her phone in the other, and she had no idea where her dog's leash was, let alone gauze. By the time she'd torn the house apart looking for something to wrap the paw, the bleeding had slowed on its own, but she was shaking. That scene plays out in homes every week.
A small cut, a bee sting, a paw that got nicked on a sharp rock on a Saturday hike when the clinic is closed. None of these are catastrophes, but they feel like one when you're rummaging through a junk drawer with a yelping pet in your lap.
A first-aid kit doesn't make you a veterinarian, and it isn't meant to. What it buys you is a calm fifteen minutes: enough to stabilize a minor problem, or to keep a bigger one from getting worse while you get to a clinic. Here's how I'd build one, step by step.
Start with the right container
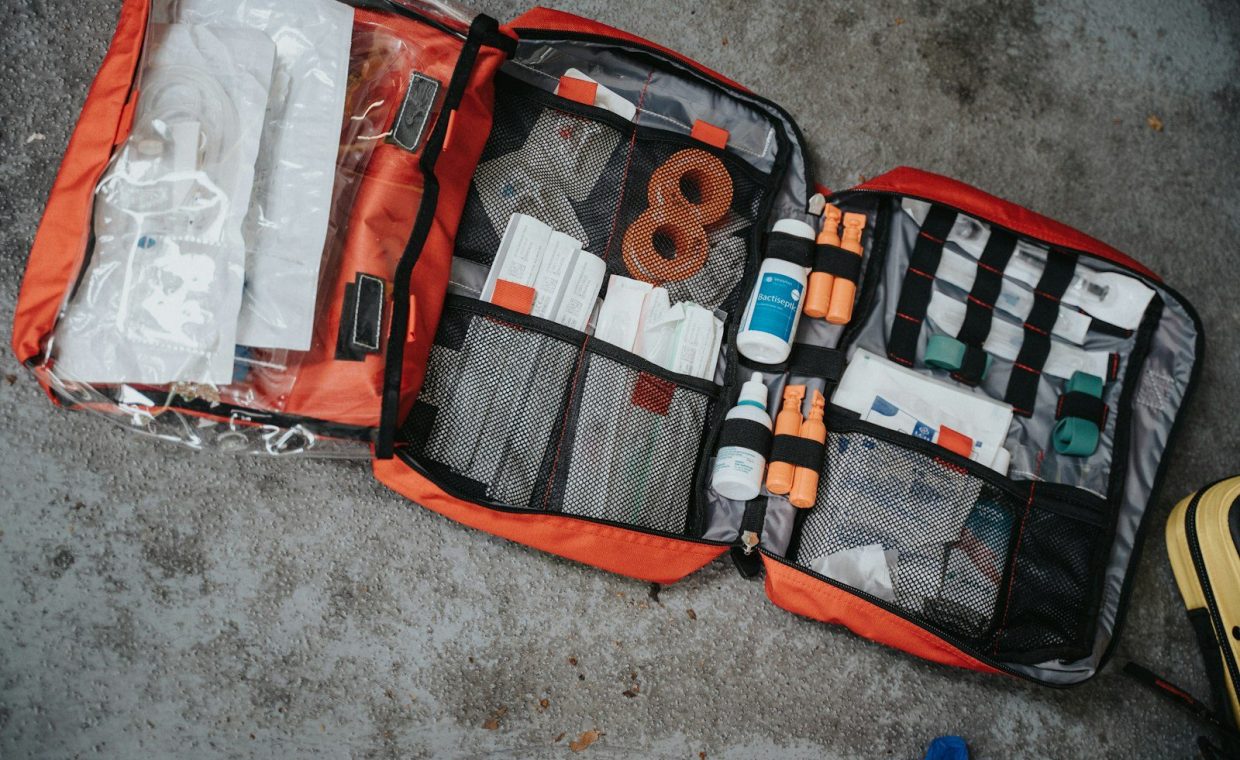
Before you buy a single supply, choose where it all lives. A clear plastic tackle box or a zippered fabric pouch with internal pockets both work well. The goal is something you can grab with one hand and open without thinking.
Avoid the temptation to use a random shoebox. Under stress, you want compartments so you can find scissors without dumping everything onto the floor. Label the outside, and keep a second smaller version in your car if you hike or travel with your pet.
Tape a small laminated card inside the lid with your vet's number, the nearest emergency clinic, and the animal poison control line. In a real scramble, you won't want to be digging through your phone and searching.
Pack the wound-care basics
This is the heart of the kit, because cuts, scrapes, and torn nails are by far the most common minor emergencies I see at home. Gather sterile gauze pads, a roll of self-adhesive bandage wrap (the stretchy kind that clings to itself), and non-stick wound pads.
Add a pair of blunt-tipped scissors, clean tweezers for splinters or stingers, and a bottle of sterile saline for flushing debris out of a wound. Saline is gentle and hard to misuse, which is exactly why I prefer it over anything harsher straight out of the bottle.
A digital thermometer rounds this section out. A dog or cat's normal temperature runs higher than ours, so knowing the number gives your vet something useful to work with over the phone.
Think about restraint and handling
Here's the part people skip, and it's the one I'd argue matters most. A pet in pain may bite, even the gentlest one, because pain overrides trust for a moment. A soft muzzle sized for your pet, or simply a roll of gauze to fashion one for a dog, can protect both of you.
Include a spare slip leash and a clean towel or small blanket. The towel doubles as a way to gently wrap a frightened cat, a makeshift stretcher for a small dog, and padding for a wound.
Never muzzle a pet that is vomiting, struggling to breathe, or showing signs of heatstroke. In those cases you need their airway clear, and you need a vet immediately, not a bandage.
Add the comfort and cleanup layer
Some items don't treat anything directly but make the whole process smoother. Pack disposable gloves, a few zip-top bags for soiled materials or for collecting a sample your vet might want to see, and pet-safe antiseptic wipes.
I also tuck in a couple of high-value treats. Not for nutrition, obviously, but because a lick of something delicious can distract a nervous dog long enough for you to look at a paw. If you're ever unsure how much extra to give around mealtimes, my colleague's rundown on working out the right daily portion for your dog is a sensible reference to keep nearby.
Round it out with a small flashlight and a fresh battery. Emergencies have a way of happening at dusk, in the yard, where the lighting is never on your side.
Handle parasites and skin without guesswork
Outdoor pets pick up unwelcome passengers, and your kit should be ready. A fine-toothed flea comb and a proper tick-removal tool earn their place, especially in warmer months.
Knowing what you're dealing with changes how you respond, so it helps to be able to tell a flea from a tick and react appropriately before you reach for anything. Remove a tick with steady, straight-out pressure using the tool, then drop it in a sealed bag in case your vet wants to identify it later.
Skip the home remedies you read about online. Matches, petroleum jelly, and nail polish do not safely remove ticks, and they can make a clean removal harder.
Know what belongs in the kit and what doesn't
Owners often want to add human medicine "just in case," and this is where I get firmly cautious. Many products that are routine for us are genuinely dangerous for pets, and dosing is not something to improvise from a website.
Use the quick guide below to sort the helpful from the hold-off.
| Keep in the kit | Leave out (call your vet first) |
|---|---|
| Sterile gauze, non-stick pads, self-adhesive wrap | Any human pain reliever or anti-inflammatory |
| Sterile saline for flushing wounds | Hydrogen peroxide used routinely on skin |
| Blunt scissors, tweezers, tick tool | Cotton balls left loose inside a wound |
| Digital thermometer, gloves, flashlight | Antibiotic ointments you'd use on yourself, unless your vet approves them |
Anything you'd give by mouth should be checked with your veterinarian. They may have specific medications or instructions for your individual pet, and those belong in the kit only on their say-so.
Store it, check it, and practice
A kit you can't find is a kit you don't have. Keep it somewhere central and consistent, not buried in a closet behind the holiday decorations. Everyone in the household should know exactly where it lives.
Set a reminder to check it twice a year. Saline expires, batteries die, and bandages get used and never replaced. While you're at it, a routine wellness check is a good moment to ask your vet to glance over your kit, the same way you might raise small concerns like the early dental care slip-ups that quietly damage teeth before they turn into bigger procedures.
One grab-and-go container, solid wound-care supplies, a way to safely restrain and comfort your pet, parasite tools, and clearly posted emergency numbers. Nothing given by mouth without your vet's okay.
When the kit isn't enough
I want to be clear about the limits, because a confident owner can sometimes wait too long. Your first-aid kit is for minor, stable situations: small cuts, a stinger, a broken nail, a tick.
If your pet is having trouble breathing, collapses, has a seizure, bloats, or you suspect they've swallowed something toxic, skip the kit entirely and get to an emergency clinic right away. Bandaging a symptom of a serious problem only costs you time you don't have.
How often should I replace items in my pet first-aid kit?
Check the kit every six months. Replace anything expired, used, or degraded, including saline, antiseptic wipes, and the flashlight battery, so everything works the moment you need it.
Can I use my own first-aid supplies on my pet?
Gauze, non-stick pads, and bandage wrap are generally fine to share. But never give human oral medications, and check with your veterinarian before using any human ointment, as several common products are unsafe for animals.
Is a first-aid kit a substitute for seeing the vet?
No. It helps you handle minor issues calmly and stabilize a pet on the way to care. For any serious or worsening sign, contact your veterinarian or an emergency clinic without delay.
Building this kit takes one afternoon and a single shopping trip, and then it quietly waits in a drawer for the day you're grateful it's there. If you only do one thing this week, post those emergency numbers where everyone can see them. Talk to your own veterinarian about anything specific to your pet, and treat the kit as your steady first move, never your last.